3 Ways to Take Your Motion GFX to the Next Level
With the boom of video content being both more algorithmically friendly and better at driving consumer engagement than digital stills, many companies have leaned into pushing out motion graphics rather than posting a still image; this is especially true on owned media platforms like Instagram and Facebook. With this heightened demand from clients for motion graphics, more and more creatives are turning to After Effects as the next Adobe Suite program to add to their toolbelt. The basics are a YouTube tutorial away; that’s how I got my personal start back when I was just a curious advertising graduate student trying to figure out what creative path I wanted to pursue. By the time I graduated with my Master’s in Advertising, I learned the finesse that’s seen in a motion graphics Google ad doesn’t come from simple linear keyframes placed on a timeline.
Motion graphic design is all about pacing and rhythm, and looks best when it emulates movement that feels natural to us. There are three additions to my workflow that have taken the quality of my work to the next level. They’re simple in nature, but not overtly obvious to creatives new to the After Effects interface; there’s some digging you’ll need to do when it comes to figuring out the program’s full potential, and these three tips are just scratching the surface.
Find Your Groove—Pick Your Music
Finding the piece of music that you’ll be building the rhythm and motion of the animation around is vital. Music can set the pace of a motion graphics piece, and sometimes can even guide you on animation choices. For example, a whooshing sound can give way to a nicely eased position change for an asset, while a staccato beat can lend itself to giving a scale bounce transition a nice oomph. This Google spot about the Google Workspace is a great example of a team that utilized both the rhythm of the music piece they were animating around, and also added in sound effects that emphasized the animation choices they made.
I will warn that working with audio in After Effects can be a bit of a pain, depending on how much RAM you have on your workstation. A secondary tip to cope with these limitations is scrubbing through the audio on the timeline (cmd/ctrl+cursor drag) and using markers to notate the specific beats you plan to utilize.
“When it comes to working with keyframes, linear has its time and place, but for most animations we try to achieve in motion graphics, like transitioning from one scene to another or having an asset introduced into your composition, eased keyframes are king.”
Express Yourself—Utilize Expressions
Expressions are one of the most useful tools you can use in After Effects. If you’ve ever tried to key frame inertial movement by hand, I can tell you that I was also doing the same not too long ago, and that branching out into using expressions (as intimidating as they seem) has both sped up my workflow and added the clean, “professional” touch I’d always strived for. The biggest boost in my confidence when utilizing expressions came from the School of Motion and Motion Island.
School of Motion is an incredible resource that breaks down the variables of commonly used expressions in an easily digestible fashion, which will help when it comes to tweaking the values of the expressions to get the exact effect you need for your project. Motion Island, on the other hand, is dedicated to creating a master list of the most useful expressions an animator could need. No need to worry about coding expressions by hand; Motion Island likely already has an expression you can tweak for what you’d like to achieve. And the most important thing to remember? You’ll learn just by using them, so start venturing out and experimenting! Below is a visual of how an inertial expression can take a simple scale change or movement of an asset’s position to the next level.
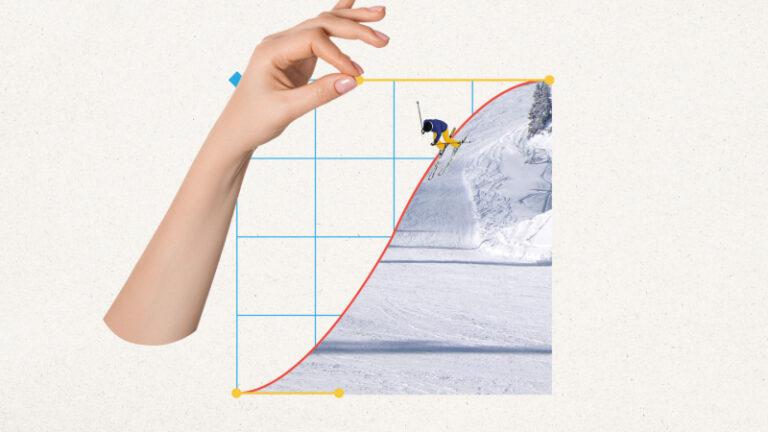
Take It Easy—Get Familiar with Your Graph Editor
When it comes to working with keyframes, linear has its time and place, but for most animations we try to achieve in motion graphics, like transitioning from one scene to another or having an asset introduced into your composition, eased keyframes are king. Even just using standard easing (Fn+F9 on highlighted keyframes if you’re on a Mac) is enough to add a nice smooth movement to your properties but opening that graph and playing with your Bezier handles is going to kick everything up a notch. Moving these Bezier handles around gives you more options when it comes to movement and the speed at which your property changes are happening. Do you want something to explode onto the screen and then ease to a stop? Or maybe a slow ramp up to a bigger movement works better for your project? The options are seemingly limitless, and this tutorial from School of Motion is an excellent jumping-off point for digging into the graph editor.
Have any post-production questions or video projects you’d like help with for your brand? Contact us today and let us know how we can help.
Lexi Vazquez is Redroc's Editorial and Motion Graphics Specialist. She received her Master's in Advertising from the University of Texas while creating video content for an AAA game developer and well-known content creators.

Pixels & Points | Industry Update: New YouTube Ads and Predictions on Digital Media Spending
Explore exciting new changes in the world of advertising and digital media – from YouTube’s latest ad feature to the growth of digital media spending in episode 03 of Pixels and Points.

Pixels & Points | Streaming Innovations: NBC Upgrades with ATSC 3.0 and Disney-Fox Sports Merger
Explore changes in TV and sports broadcasting from NBC Universal, Disney and Fox Sports in episode 02 of Pixels and Points.